In latch hooking, you use short pieces of yarn and tie them to the canvas. It can be used to make small rugs, wall hangings, or pillows. It is the dainty version of rug making, which uses grids large enough to cover a floor and fewer colors than latch hooking.
Our Latch Hook kits come with all you need, pre-cut yarn in packages, hook, canvas and instructions.
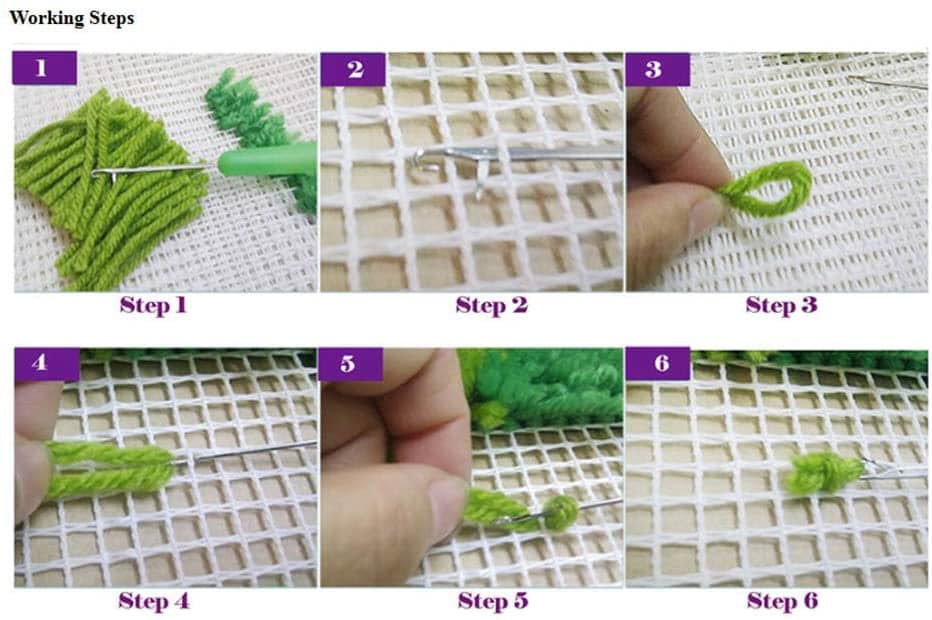
Slide your hook tool underneath the canvas strand and bring it back on top of the grid through the square above.
Position the tool so that the latch rests on top of the strand, with the strand in between the latch and the tool’s bar.
Check your pattern and slide the appropriate colored yarn segment under the handle of the tool until it is flush with the canvas strand. The pattern should have symbols for each color of yarn and a key for decoding the symbols. Each box on the pattern represents the strand at the top of a row of squares, not the strand at the bottom.
Take both ends of the yarn in your fingers and pull them to the left of the tool and under the latch.
Wrap the yarn to the right around the latch and tug the tool down quickly.
The latch should rise so that the ends of the yarn are in between the hook and the latch.
The hook should pull the ends of the yarn through the yarn looped around the latch and through the canvas square.
The end result should be the yarn segment knotted on the canvas strand.
Continue to follow your pattern and latch the appropriate colors onto their appropriate strands.
Check the back of the canvas grid to see if the yarn is knotted properly. If it is, it should look like this picture.

After hooking several rows, check to see if the hooked yarn segments are uneven, and use scissors to cut the excess.